After running our samples with the 35S primer, we got one result in the sixth lane. Therefore, with the data we collected, we can’t really make a conclusion if there is truly a difference in organic vs inorganic foods and we also can’t make a conclusion on if there is a difference in the fruits and vegetables at King Soopers vs. Sprouts. Even though our lab results don’t really show it, I think I have definitely grown in my lab skills and the techniques we have learned in the class. I have also really learned how a professional lab notebook looks and how to keep one. During this last lab, I think Jordan and I did an excellent job at writing details about the protocol, labeling everything, and keeping track of everything we do. I have definitely grown in my understanding of each lab technique we learned and how they can be used and applied.
Final Project Blog #2
Today we ran our samples with the Tubulin primer and we were able to see the markers as well as one band in lane six. Below is the picture of our gel.

We then decided that we would run our samples with the 35S primer in our own gels to see if we would get better results. So for the rest of the day today, we made our own gels and let them solidify so that tomorrow we can run our samples with the 35S primer. Depending on our results tomorrow, we may or may not be able to do the public outreach because of the data we may have and time’s sake.
Final project blog #1
We extracted the DNA from all of our organic and inorganic apples and zucchinis from King Soopers and Sprouts on Friday (December 8th). Then we amplified our samples using PCR on Monday (December 11th). Today, (December 12th) we ran the samples on a precast gel using gel electrophoresis. We viewed the gel under UV light and saw no results in ant of our lanes so we decided it would be best if we did the lab over again and change some things. We are thinking of only using the inside of the apples and zucchinis instead of the skin because the skin was very hard to crush up with the pastel and made it hard to get a pellet. After letting the 100ul of TE buffer with RNase sit in the freezer, we pipetted up and down to dissolve the pellet, but it turns out, the pellet is the ‘junk’ in the solution that the buffer was supposed to break down. Therefore, we do not want to resuspend the pellet because we are only supposed to add the supernatant to the PCR tubes. Hopefully, on the next go around, we are able to be more precise in the DNA extraction and be able to see bands on the gel.
Purification of Green Fluorescent Protein
The purpose of this experiment is to extract the green fluorescent protein (GFP) from the E. coli cells. This is accomplished through four different protocols. The first process is growing the E. coli cells in liquid media in two culture tubes. To do this, we put one glowing colony in each culture tube containing LB broth. Then we put the tubes in the incubator at horizontally at 32°C so there was more surface area of liquid to oxygen to help the cells replicate faster (along with shaking the tubes periodically). Here were our results:

The next process, is concentration of bacteria and cell lysis. In order to do this we removed 2 mL of the liquid and transferred it to a microcentrifuge tube. After centrifuging, we removed the supernatant and observed the pellet. The final step in this process is to add the lysozyme and freeze the bacteria to completely break down the cell wall. Here were our results:
The next process is to remove the cell garbage so we only have the green fluorescent protein. After thawing the tubes from the freezer and centrifuging, we were not interested in the pellet, so we transferred all the supernatant with GFP to another tube. Here were our results:


The final process is hydrophobic Interaction chromatography (HIC) which is a separating technique used for purifying proteins and it is very useful for separating molecules based on their hydrophobicity. In this process we had four different buffers to purify GFP (equilibrium buffer, binding buffer, wash buffer, and elution buffer). We added the supernatant to the column and watched the GFP travel down until it began to drip out and we begun collecting the purified GFP. Here were our results:


This four step protocol taught me so much about the properties of an E. coli cell like how durable they are and what is necessary to decompose a cell wall. I also learned more about the chemical properties and structures to each buffer and how their chemical structure relates to their function in hydrophobic interaction chromatography. Most of all, this lab also taught me patients in a laboratory environment because if you rushed one of these steps, it would ruin the expected results.
Transformation of the pGLO Plasmid
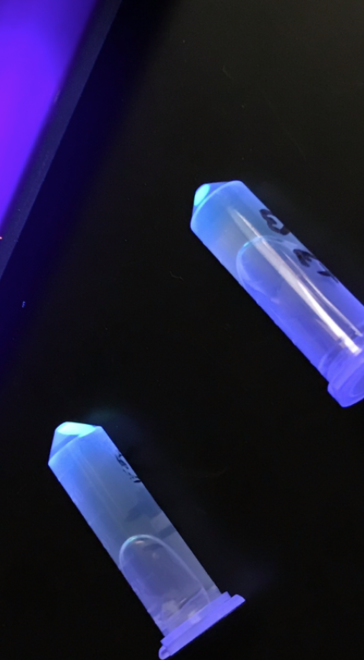
The purpose of this lab was to introduce the pGLO plasmid into the E. coli cells that were previously grown and provide an environment for these cells to grow and express their newly acquired genes. First, we added CaCl2 as the transformation solution to each micro test tube because the presence of the positively charged calcium ions attracts the negatively charged DNA backbone. After adding a single colony of E. coli and the pGLO plasmid to the transformation solution, the pGLO plasmid can pass into the cell upon heat shock. Now that the plasmid is hopefully in the E. coli cells, we add LB broth to the micro test tube for nutrients for the cells to grow. Finally, we spread part of the liquid with CaCl2, E. coli cells, pGLO plasmid, and LB broth onto two Petri dishes and left them in an incubator at 37°C overnight. The next day we had 6 total satellite colonies that expressed the pGLO plasmid under UV light (see pictures below).


During this protocol, I learned and was able to practice aseptic technique by torching the inoculation loops and the importance of waiting until they cool so you do not burn the E. coli cells or the plasmid. I also learned the usefulness of any transformation solution as well as the importance of heat shock and how they help the process of transformation.
Response to Chapter 24 – Cells
After reading chapter 24 about cells from A Short History of Nearly Everything, I liked how simple Bill Bryson was able to explain the complexity of cells. One part I particularly enjoyed was when he explained what a cell would be like if an atom was the size of a pea and if it stretched out half a mile. Even after taking AP biology, this analogy helped explain and clearly show the complexity of one cell using everyday human objects. One thing I found confusing was the organization this chapter, but overall I truly appreciated Bryson’s writing. After reading this, I learned some smaller details about cells like humans are only born with a set number of nerve cells and that there is only one fatal malignancy for each 100 million billion cell divisions. It is mind-blowing to think how complex our bodies are but more so how sufficient our bodies are at keeping us alive and functioning. More impotently, while reading this, I gained so much respect for everything Leeuwenhoek and other scientists went through to learn about cells. Today, we can learn everything about cells on the internet in 20 minutes which took these scientists years to learn through failed experiments and hours in lab. I have come to appreciate the willingness and hard work of these scientists that has allowed us at Castle View High School to explore the possibilities of synthetic biology.
